Showing posts with label Kids in Design. Show all posts

Wednesday, August 10, 2016

Let's Have a Parade...of Homes!


We once again embarked on the Salt Lake Parade of Homes with A and A in tow and once again we were so pleasantly surprised by their interest and excitement of touring the amazing houses. They were both in awe of the cute elements that were obviously made to make the house kid friendly but also at lots of little items. The TV that seemed to "magically" appear from the ceiling of a master bedroom was a big hit. Even the HUGE walk-in closets garnered squeals of excitement ("Someone could LIVE in this closet!" Little a exclaimed!) The biggest hit was a "hidden" reading nook that was tucked behind a secret bookshelf. I have to admit it was probably my favorite feature too!

I don't know if it's the grandeur of the homes, the shine of all the elegant décor or the overall "adult" atmosphere but whatever the reason A and A acted SO grown-up! They walked (didn't run!) and kept their hands to themselves, they visited with other house goers and politely waited their turn in the more crowded houses. It was so fun to watch my wild and crazy duo acting so proper!

It's funny that people think that kids wont like this kind of thing. Just because they are kids doesn't mean they wont be just as in awe of the amazing mansions of the Parade of Homes. The "Kid Caves" and Media Rooms are just as awesome to them as they are to you. So as you contemplate checking out the Parade of Homes consider taking your little ones along, their interest might surprise you.

As we spent a full day touring homes in sweltering heat, sudden micro-burst rain, and crazy pelting hail A and A whined and complained on the way home. "Can't we go to just one more house???" Big A whined.

A thanks to the Salt Lake Builders Association for providing us passes to the Salt Lake Parade of Homes,
All opinions are my own.


Tuesday, July 26, 2016

Salt Lake Parade of Homes DISCOUNT!!!


The Salt Lake Parade of Homes is almost here! A& A are so excited about going again this year! (Check out our fun last year…  HGTV Kids )


Salt Lake Parade of Homes 2016
July 29 - August 13, 2016
Monday - Saturday 12:00 pm - 9:00 pm
Closed Sundays

The Salk Lake Home Builders Association is giving my readers a FANTASTIC deal! $3 off tickets! Use coupon code adventures when you check out and save $3 on each ticket you buy!

Buy Tickets Here!

 ***Remember use adventures as your coupon code and get your $16 tickets for just $13!!!

Check back soon for a look at our Parade of Homes 2016 Adventures!

Thursday, August 13, 2015

The Parade of Homes with HGTV Raised Kids


When I think about the Salt Lake Parade of Holmes I am filled with nostalgia. I have wonderful memories of going through these amazing Mansions with my mom as a kid. Awestruck by the pools, tennis courts, kitchens. I have wanted to share this with my kids but I thought they were still a bit too young.
 Then a few months ago we were visiting some friends way out west in the Salt Lake valley in an up and coming area. Their neighborhood was surrounded by new developments all touting open model homes. On a whim we stopped by one to see what it was like. A and a were great, nicely looking through the house, examining the fun new features. When we left Big A said “Mommy do you think we’ll be on TV?” laughingly I asked him “Why would we be on TV?” “Well on “Love it or List it” of course! I didn’t even see David there.” (FYI “Love it or List it" is an HGTV show about remodeling your house or buying a new one). We obviously watch enough HGTV that it has filtered down to A and a. As we were headed back home A and A both begged to go see more houses. That was it, I knew the Parade of Homes would be a fun family adventure.
We got our passes, loaded the Parade of Homes app on our phones and off we went. The Parade is a scattered site event but the App provides you perfect turn by turn GPS directions to all the houses. To not overwhelm the kids we did 5 -6 houses at a time. The houses are located in general “clusters” and made breaking up our visits really easy.
My worries about the kids being too small were quashed on the first site we visited. They loved exploring the big houses, checking out cool features (Movie Room!, Waterfall Glass Hallway floor!, Hidden Pantry door to the garage!) and pointing out not so cool features (Glass walled showers in the front of the house!, Tiny kids rooms!, a Bidet! EW!).  They have picked up way more HGTV than we thought “Mom doesn’t this look like a wall the “Property Brothers” would have done?” Big A said of a cool reclaimed wall.
Of all the houses though the kids only claimed one was a “List It” (meaning we’d sell our house to buy that one) and Jeff and I actually agreed... if we had $1.5 million to spend. It was heartening that of all the other cool houses they still liked our house better.
After we had hit the houses we’d planned and were headed home both A and a were  whining in the back seat of the car “We wanna see more houses!” For all the parents who think that the Parade of Homes isn’t for their kids, reconsider.
Thank you to the Salt Lake Home Builder’s Association for providing us passes to the Parade of Homes. All views and opinions are my own.


Tuesday, November 25, 2014

Turkey Tie Tee


I love Thanksgiving time. The Wonderful Food, Being with family, warm festive feelings of love and thanks, what more could you ask for in a holiday?

Well I have one think… a cute “thanksgiving” themed shirt for big A. For girls you can find dressed, tutu’s, embellished tees and accessories all adorned with turkeys and such in all girl sizes. For boys they have cute baby things, and Carters sometimes has holiday things up to 5T but if you’re a boy and bigger than that you’re outta luck. This stinks for a fun holiday loving little guys like Big A who happens to be a size 7/8!

Crafty Mom to the rescue! I created a fun and festive Tee for him that is comfortable, festive and can count as “dressing up” for dinner.

Turkey Tie Tee

1 Solid color tee, black or brown (I got one on super sale at JoAnn’s)

1/8 yard “fancy” thanksgiving fabric (I did a fun brown brocade print)

Felt (or fabric) Scraps in Orange, Red, Black and White

1/8 yard paper backed fusible webbing

Sewing items (Sewing machine or Needle and thread)
 
Cut out Tie (patterned material), whites of eyes (White), pupils (black) "Gobbler" red and beak (orange)
I just cut them out freehand, make sure your tie fits your tee 

Attach paper backed fusible webbing to all your cut pieces

Tack down the tie using paper backed fusible webbing
**Only do Tie at this point

Stitch around all seams (I used a sewing machine)
**Do each piece in order, tack down Tie and sew,
then tack down whites of eyes and "gobbler" and sew,
last tack down pupils and beak and sew.

The finished product

Big A wearing is Turkey Tee last year
 

Wednesday, November 19, 2014

Pilgrim Pattern Easy, No Sew, and SUPER cute!


I so love creating holiday themed things for A and a, I also love doing “fun” photo shoots for the holidays. I fear one day my kids will be featured on awkwardfamilyphotos.com…. But for now they are cool with it and I love it. When Big A was 3 and Little was a few months old I did a Pilgrim themed costume craft and photo shoot that I still LOVE. Those pics are the center of my Thanksgiving time mantle. Well now Little a is 3 and can fit in Big A’s hand-me-down cuffs and collar so I decided to bring it all back out. I had to do an apron for her and a whole new set for him but it was super easy and the results are SO cute!

What I ended up doing is making cuffs and a collar for each then an apron for her and a belt and a hat “belt” for him. I dressed them each in dark clothes (Him, Navy Sweats and long sleeved tee. Her, Black tights, skirt and long sleeved tee) with the few “pilgrim” pieces it created an adorable total Pilgrim vibe with minimal effort.
 
The pictures turned out really cute. I threw them into Photoshop to add the sepia tone. I thought it gave it a fun “1621” feel and made the under clothes color difference (blue and black) not really matter.

Below is a printable version of the pattern for the cuffs, collar, buckle and belt… It is sized for a three year old but it is VERY easy to scale it up for an older child (or even an adult,,, hey there’s an idea)
 
Basic Instructions:
 
Materials:

½ yard white felt or fleece

¼ yard brown felt or fleece

(I use anti-pill fleece. It doesn’t fray and holds up WAY better than felt)

Heavy cardboard

Gold paint or spray-paint

2 buttons

Fabric glue

(optional) needle and thread

If you use fleece or felt you don’t have to worry about any hemming as the material won’t fray. It’s an easy cut and go project!

Collar:

Fold your white fabric in half and then in half again (see diagram)

Follow pattern and cut. Make an addition small slit (1/2 to 1 inch) in the back or the neck hole to get it over the head more easily.

Cuffs:

Fold your white fabric in half and place pattern on the fold.

Cut. Use fabric glue or needle and thread and stitch (or glue) button onto the cuff where indicated (I sewed it… easy peasy).

Belt (and Hat belt):

Measure the circumference of your child’s waist and the circumference of the hat you are using (ours was a $5 cowboy hat from Wal-Marts toy department) add about an inch to that measurement. Cut your brown fabric about 2” wide to the length you measured.

 Cut out the buckle pattern from the cardboard and paint or spray-paint it gold.

Glue “buckles” onto your belts.

Glue “hat belt” together and slip onto your hat.

Safety pin your belt onto your child.

 
Bing Bam Boom… Done J
 
 
                                                   click HERE for free printable pattern


Sunday, June 29, 2014

Utah Arts Fest 2014


It is time for the Utah ARTS fest again. We loaded up the kids and headed downtown to check out all the sights. This year one of the main sponsors was "Shock Top" and the kids LOVED the Cars decked out in Shock Top Mohawks. The kids "Art Yard" had a Mad Hatter party and the kids were able to let their creative juices flow and create awesome chapeau's. There were life sized cows, chicks and tractor's that the kiddos helped decorate. Our "big" purchase was two bow and arrow sets that A and a were super stoked about.

 Oh yea there was also lots of art. Jeff and I got to do a quick perusal of the art in between kiddo activities. Someday we will have a civilized art focused time at the ARTS fest again but now is not that time. I am sure when that time comes we will miss our crazy times in the kids art yard.


Tuesday, October 15, 2013

Easy Peasy DIY Photo Magnets

I Love the idea of Photo Magnets. Having your favorite pics on the fridge without having them swoop out from behind a magnet. I however do not like the idea of paying $5+ for a 2" x 4" magnet from the photo places. I often get emails for "free" magnets that turn out still being over $4 for shipping and handling... No Way!

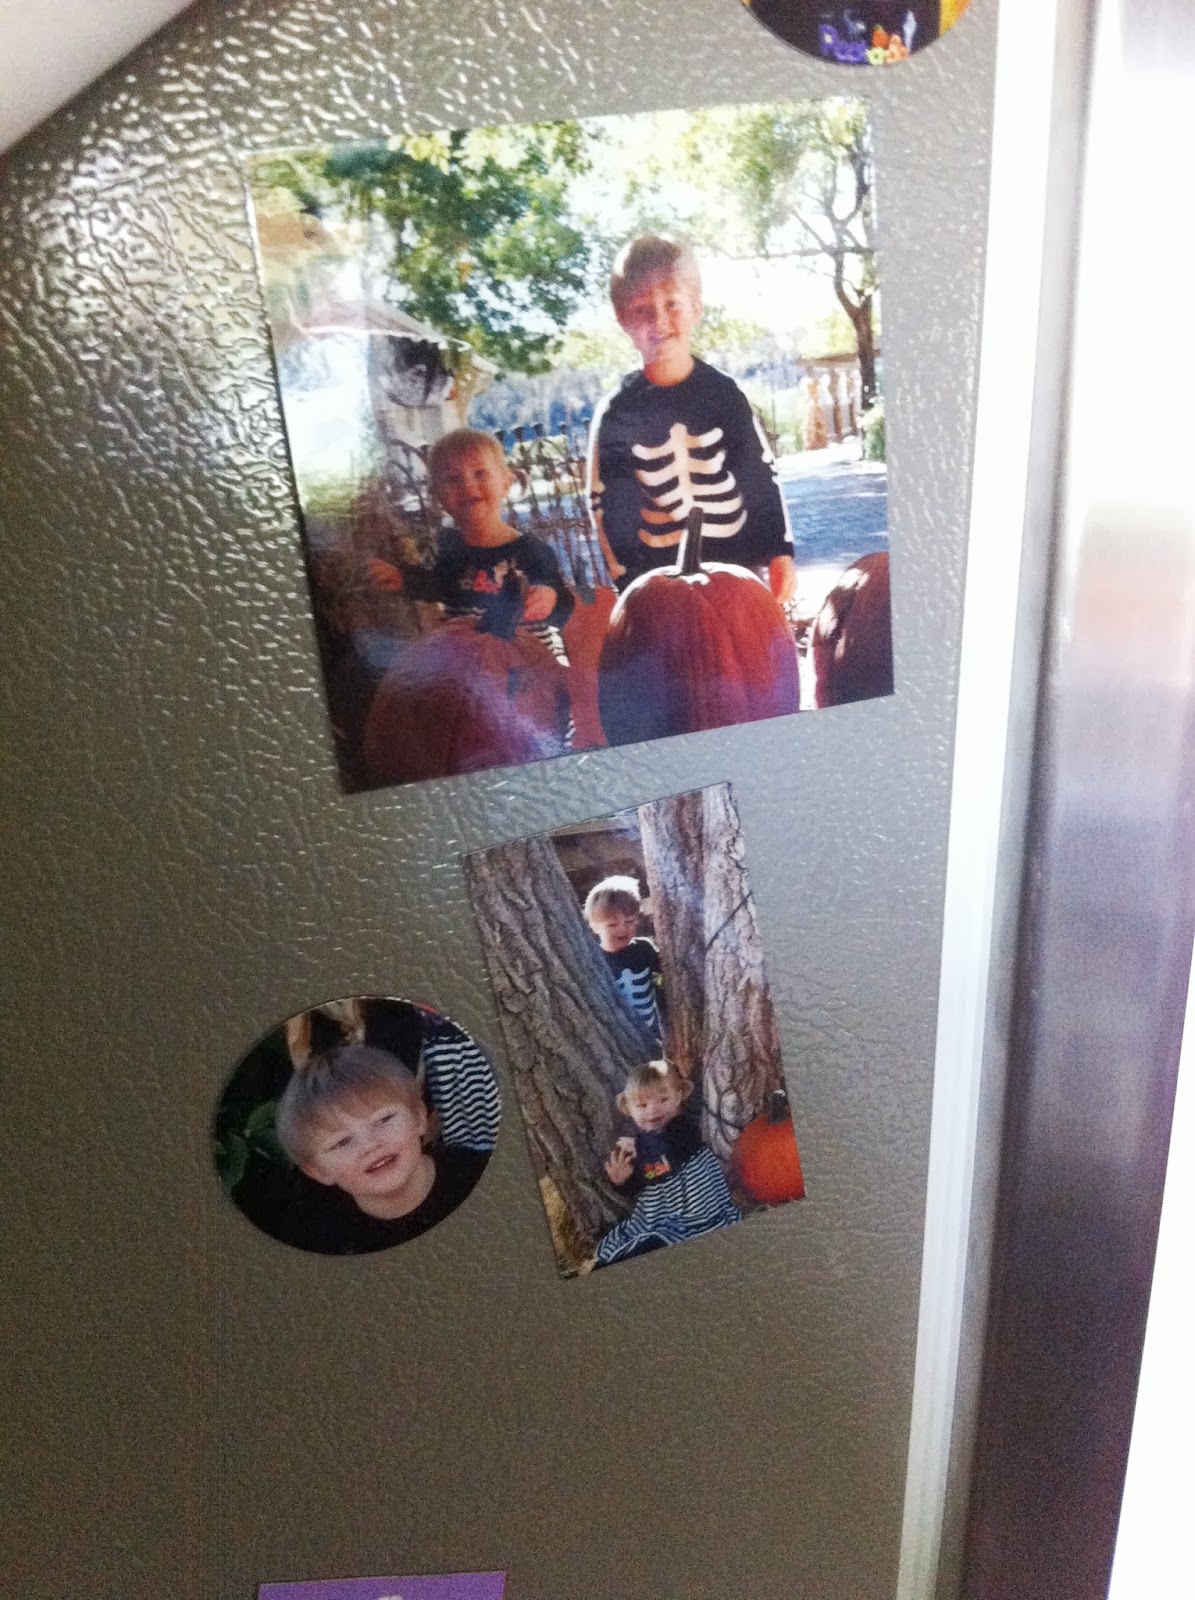
I decided to try my hand at creating some and found out that you can EASILY (seriously it IS easy!!!) make these yourself for...(drum roll)...free!

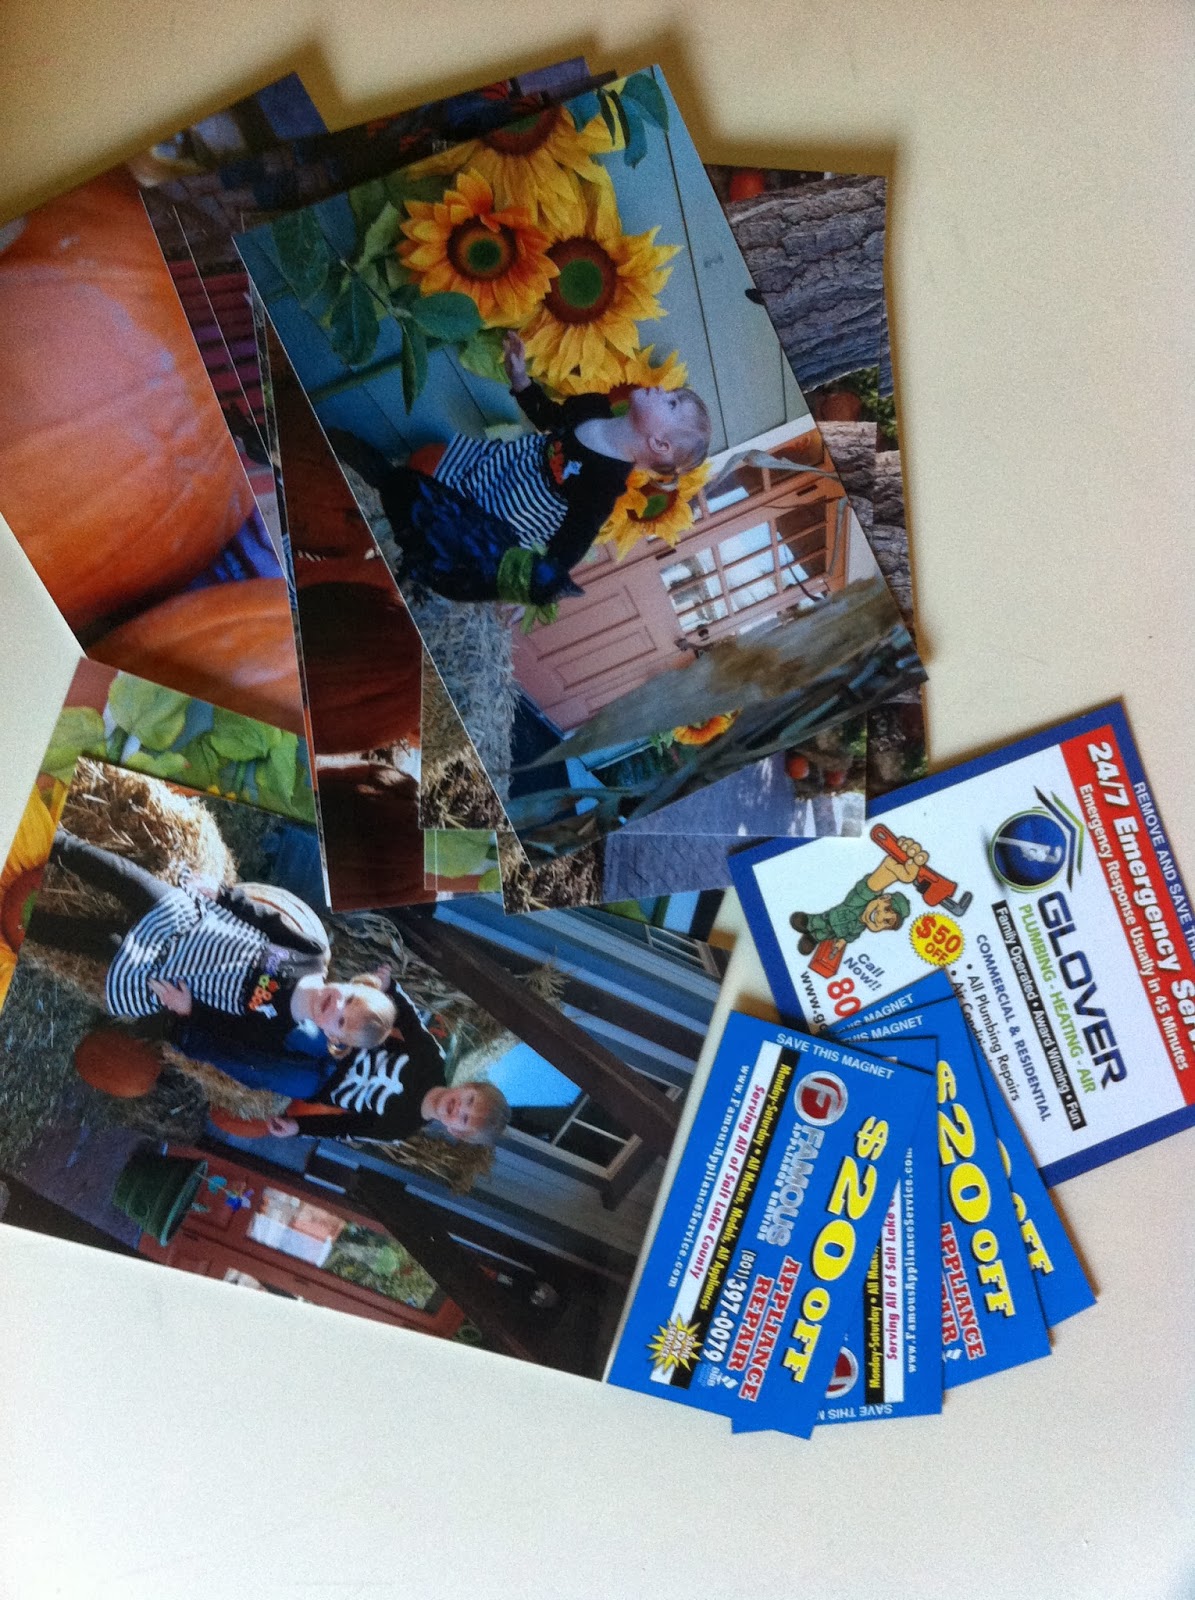
To start off you need to collect any advertising magnets you come across. One place you can easily find a few is attached to your phonebook. When my office got new phonebooks this fall I asked if anyone minded if I filched all the magnets, no one minded, SCORE! 20+ magnets. Now that you are thinking about them you will find that they are all over the place. I have found them at restaurants, the vets office, our cable company office. All over. SO when you happen upon some, grab a few for later use. You can buy sheets of magnet at the craft store but its is really pricey and really with all the freebies out there you don't need to.

Now that you have your magnets all you need is some glossy pictures, adhesive (double sided tape, sticker maker, tape runner etc) and scissors.

First Gather your photos and advertizing magnets


Next cut your magnet and photos to the same size.
 (I like to do different shapes, Here I did 2" round ones with a large punch I have.)

Next apply adhesive to your photos.
(I used the Xyron creat-a-sticker, but you could use double sided tape,
  a tape runner, or even a strong glue stick)

Next Carefully line up your photo to the pre-cut magnet and stick them together

Ta Da! Truely Free Photo Magnets!!

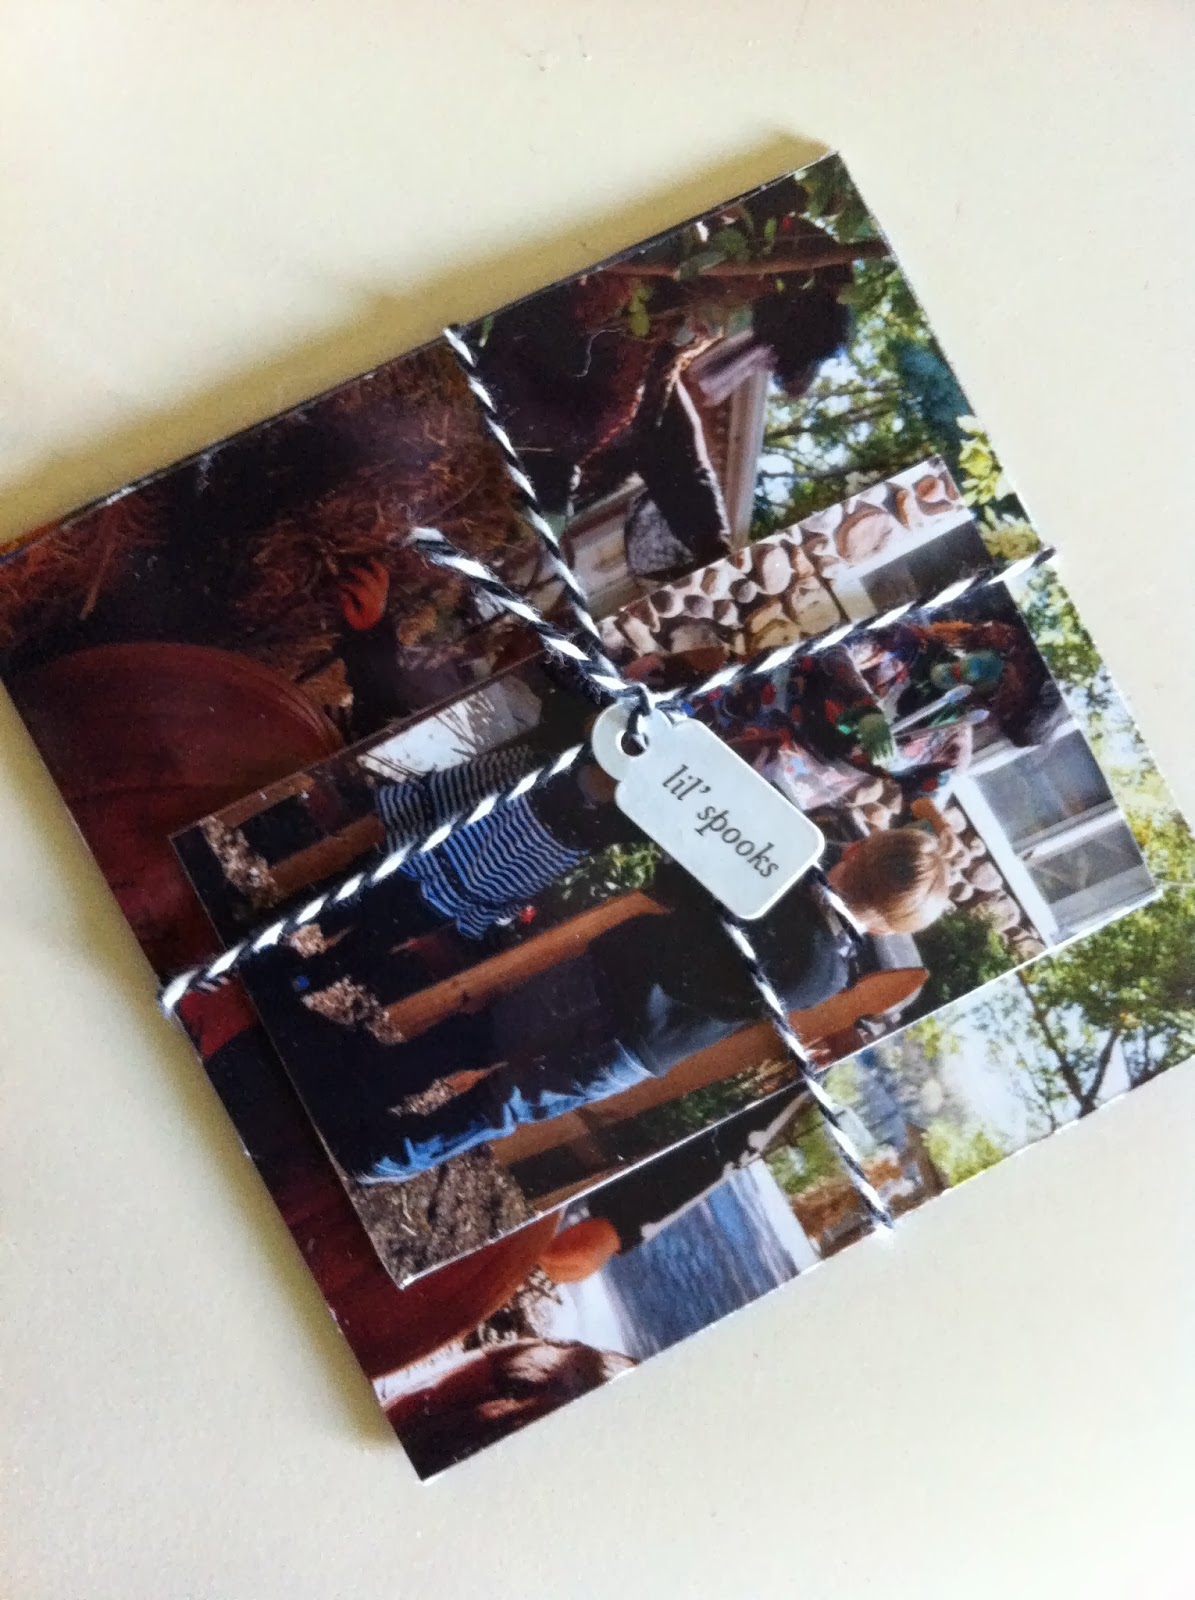
I like to make little bundles for the grandparents for holidays.
Fast easy presents that they love and can actually can use.


Monday, April 30, 2012

Bathroom Decorating


It is finally done!! We have had the basement bathroom finished for over a year but it had no style, no pizzaz. I have searched and searched for art that really worked, I was especially drawn to vintage bath pics of kids.  Then I looked in my own bathtub. I got some cute shots of A and A and had them printed in black and white. I got some fun thrift store frames and spray painted them glossy white (The oval frame was an old gold one that my mom actually found in storage right after I told her I was looking for an oval frame! score!) I think it turned out nice and classic looking with a personalized touch. Here are the results...